I think this is a great recycling idea for toilet paper rolls!
And it is much fun for kids to do this!
Ich glaube, dies ist eine großartige Recycling-Idee für Klopapierrollen! Und es macht Kindern so viel Spaß, dies zu machen!
Ich fand ein Video von Innova Manualidades und dachte, dies ist etwas, was meine Enkelin lieben wird.
What you need:
2 toilet paper rolls
scissors
ruler
pencil
glue gun
school glue
glitter
Was man braucht:
2 Klopapierrollen
Schere
Lineal
Bleistift
Heißklebepistole
Bastelkleber
Glitter
Press the rolls flat.
Die Rollen flach drücken.
Mark every centimeter on both long edges of the roll.
Jeden Zentimeter an beiden langen Seiten der Rolle markieren.
Connect the points.
Die Punkte verbinden.
Cut along the lines.
Entlang der Linien zerschneiden.
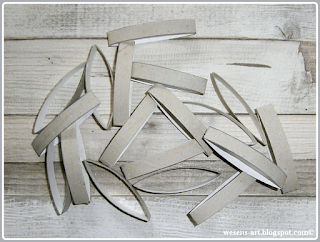
Now you must have 18 of this ovals.
Nun muss man 18 dieser Ovale haben.
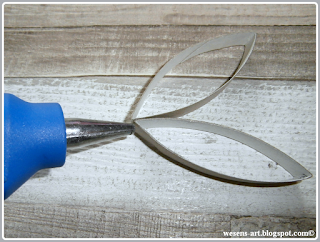
Glue 6 of this ovals at one small edge together with the glue gun (This step is only adults or older kids!)
6 dieser Ovale an einer der schmalen Kanten zusammenkleben.
(Dieser Schritt ist nur für Erwachsene oder ältere Kinder!)
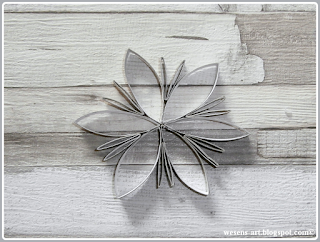
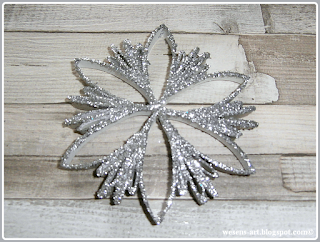
Glue them together, so you get a star.
Zusammenkleben, dann erhält man einen Stern.
Fold the other strips of the rolls in halfs.
Die anderen Streifen der Rollen in Hälften falten.
Place a point of glue on the folded edge...
Etwas Kleber auf die gefaltete Kante geben...
...and put it between 2 of the ovals.
...und zwischen 2 der Ovale kleben.
And repeat the last step.
Und den letzten Schritt wiederholen.
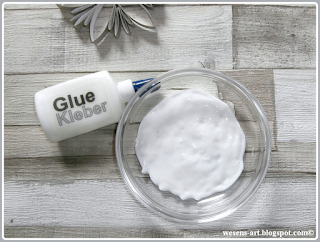
Now fill school glue into a flat bowl.
Nun Bastelkleber in eine flache Schale geben.
And place the ornament into it.
Und das Ornament hinein geben.
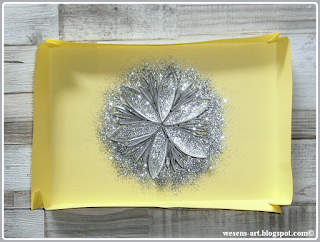
Then give glitter on a sheet of paper and place the ornament on it, with the glue on the bottom side.
Dann Glitter auf ein Blatt Papier geben und das Ornament hinein, mit dem Kleber auf der Unterseite.
Remove it from the glitter, let it dry and it's done!
Aus dem Glitter nehmen, trocken lassen und fertig!
Visit and like me on Facebook!
Attention! It is not allowed to copy or use my posts, photos, pattern, templates or files for business or selling!!!
Wichtig! Es ist untersagt, meine Beiträge, Fotos, Schnittmuster, Vorlagen oder Dateien zu kopieren oder gewerblich oder zum Verkauf zu nutzen!!!










These are beautiful!! I'm taking the idea to the school age class at my child care center!! thanks for sharing on the Pleasures of the NW's DIY party!
ReplyDeleteBeautiful and I love the idea of dunking the ornament in glue and then in the glitter instead of trying to "paint" on the glue and sprinkling glitter over it. We're going to try making these this year.
ReplyDeleteSo pretty!!! TFS
ReplyDeleteSo pretty! What a great hands on craft for kids! Thanks for sharing at DI & DI.
ReplyDeleteThese are absolutely adorable. I definitely hope to try these out before the month is out!
ReplyDeleteHow cute! I needed an easy ornament to make for all my co-workers! Looks like I can stop looking and start saving toilet paper rolls!
ReplyDeleteOh this is too cute! How fun to make! :)
ReplyDeleteI would love for you to share this with my Facebook Group for recipes, crafts, tips, and tricks: https://www.facebook.com/groups/pluckyrecipescraftstips/
Thanks for joining Cooking and Crafting with J & J!
I LOVE this idea! I've been trying to come up with ideas to do with my kids' classes in school and this is just perfect! :) Lisa
ReplyDeleteThis is a great recycling project, they came out great! Thank you for sharing with us this week at Celebrate Your Story, have a great weekend.
ReplyDeleteThese are so beautiful! I love how easy they would be to make! Thanks for sharing on the Waste Less Wednesday Blog Hop!
ReplyDeleteWow, these are really, really pretty. I love the idea of putting the glue and glitter in a bowl and dunking the star. Far less mess and it makes so much easier for little hands. Thank you for sharing with us at the sweet Inspiration party.
ReplyDeleteWell, these are just gorgeous and I would never have thought they were toilet paper rolls!
ReplyDeleteso pretty and recycled!!!
ReplyDeleteThanks for sharing at Bloggers Spotlight!
Love these -would be great to have a string of these in my house this year! Thanks for the tutorial!
ReplyDeleteI already left a comment, but I wanted to tell you that I just did these with my kids and will do them with two elementary school classes tomorrow. Great tutorial, thank you! :) Lisa
ReplyDelete